Thursday, November 28, 2013

Happy Thanksgiving!

Ready for our guests to arrive.

Happy Thanksgiving to one and all.  I hope you all have much to be thankful for:  friends, family, a happy home and love.  I know I am blessed with each of these.

Wednesday, September 25, 2013

Why so angry?

Why in the world are fashion models so angry these days?  Everywhere I look I see scowling, grimacing women wearing high fashion.

Even the pattern companies have gotten into the act.  Vogue Patterns in particular has models in poses that look like fisticuffs are going to break out any minute!

What is up with this trend?

Monday, August 12, 2013

It Has Been Awhile

I haven't written a new post in some time.  We have been very busy here.  We went to Yellowstone Park for vacation this year and it was amazing!  I had never been and it was such a beautiful and unique experience.

And, what is not to like about a place where this guy lives?


I then enjoyed a cross country trip with my sister-in-law.  She was moving from Arizona to Wisconsin.  I flew down to help her drive to her new home. We went through New Mexico, the panhandle of Texas, through Oklahoma and Missouri on our way to Milwaukee.  Whew!  What a drive!  But is was both interesting and fun to watch the scenery pass by and slowly change going from one state to another.

Well, back home and back to sewing.  I have been contemplating early fall.  I know that in a lot of places in the country, this would be premature in the middle of August.  For some folks, this is the time when summer really heats up.  Here in the Pacific Northwest, August is a reminder that the beautiful weather does not last forever.  We are having an extremely beautiful summer with clear sunny days with a light breeze and high temperatures in the upper 70s and low 80s.  When summer arrives in the Seattle area, it is astoundingly lovely.

But, the reality is that we enjoy such loveliness for only about 2 to 3 months of the year.  But the end of September, we will be looking at a slow cooling down and shorter days.  I was thinking of that part of the season and made a few tops to wear as the weather cools but is still not cold.

First up, New Look 6807, an easy 2 hour top.  I love the softness and 3/4 length sleeves.  I made it out of a geometric print ITY knit.  I made the size 10 for the upper shoulder area and neckline.  I widened out to the 14 to accommodate my bust and then tapered back down to a 10 for the hip.  This is a pretty common way for me to cut a simple tee shirt pattern to get the best fit.  Additionally, I take 1 inch out of the bodice length above the waistline to better fit my short torso.  I also shortened the top by 1.5 inches.  Really, I am only 5 feet tall, so length adjustments are usually the most important for me.


 I think the gathers in the center front are pretty and feminine.
 I chose to leave the elastic out of the sleeves to have them bell shaped and drapey rather than puffed.
 And, I especially liked the center back tie closure.  How cute!
I used my sergerr to sew all the seams.  I stabilized the shoulder seams with clear elastic that I sewed over as I sewed the seams.  I used my cover stitch machine to finish the hem.  This was a super easy make just as the pattern says it is.

Looking forward to wearing this as the temperatures cool here in the Northwest.

I will be back soon with another late summer, early fall make that is almost finished.

Lynn

Wednesday, May 8, 2013

My Madewell Shirt is Done!


And not just one shirt, but two.  In my last post, I was looking at a color blocked shirt from Madewell but did not like the color combination they chose for the shirt.

It was mint green, pale blue and pink.  I just do not like the mint green color and frankly don't look good in it.  So, I decided to change the green to a pale sunny yellow.  I selected 3 colors of 100% cotton pinpoint oxford cloth from Fabric.com.k  I chose the colors sky (blue), yellow and pink.  While I was looking at the oxford cloth, I also bought some black and white 100% cotton gingham to make a second shirt.

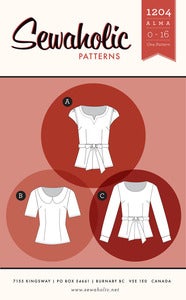
I selected a classic shirt pattern by Laura Ashley from McCall's to make both shirts, McCalls M6649.
M6649
The pattern showed one view color blocked but using 4 colors instead of the 3 I had in mind so I used the Madewell picture to decide which color to use for each part of the shirt.

Since this was a new pattern, I had to take careful measurements and make appropriate adjustments.  I took 2 inches off the sleeve length (short little T. Rex arms) and one inch from the torso length to waist (shortwaisted too).  I cut a size 12 for the shoulders and arm holes, collar and sleeves.  I cut a 14 at the bust and waist and then tapered from the waist down to a size 8 for the hips.

Since I was going to use the same pattern for both shirts, I cut and sewed them at the same time.  I used white thread to sew both shirts so it was easy to just do one particular step on both shirts as I sewed.   The most complicated part for each shirt was cutting.  I had to make double sure that I had a left and right of everything on the color block shirt.  And, I decided to cut the yoke, front band and collar stand on the gingham blouse on the bias.

Sewing was simple and straight forward.  At this point, I have made so many shirts in my sewing life that I really didn't refer to the directions at all.  What was interesting is that there was a marked difference in the texture and sew-ability between the fabrics that I probably would not have noticed if I had sewed them separately.  The gingham was much more malleable and easier to ease and stitch.

And the results?  Here they are!


 Gingham Version

I love the buttons on this one.  They were retrieved from a dress that I made for myself many, many years ago.  I wore the dress out and salvaged the buttons before getting rid of the dress.  They have an interesting triangular shape.  Also, you can see the bias cut button band.


I really like the way the bias cut yoke feels when you wear the shirt.  It gives that little extra stretch which really feels good since I have broad, muscular shoulders.


The collar stand was also cut on the bias.  That was interesting -- it was quite the feat to prevent it from becoming misshapen and stretched when I fused the interfacing to it and when I stitched down the inner collar stand after installing it on the shirt!

On me!  Wow, that is a wonky tilted picture.  Not the best photography, but I think you can still see how the shirt fits.


Madewell Version

Here you can see where I switched out the mint green for the sunny yellow.  I like this combination much better.


These button are vintage.  They were part of my mother's sewing stash when she passed away.  I am not sure how old they are but they definitely have a 1950's vibe.  They are the same pale yellow was the pinpoint oxford which I love.


 On this version, I made 2 buttons on the cuffs instead of the one called for on the pattern.


 Me again, in an equally unflattering picture.  I am going to have to start asking my husband for help with these or teach the dog how to snap photos!


Sunday, April 7, 2013

Trousers, trousers, trousers. Where do I begin.

I used to make trousers for myself all the time way back in the 80's and early 90's.  They were so simple to get right back then.  Think pleats and wider legs.  It was hard to mess up the fit of those oh-so-forgiving baggy trousers.  The only 2 things you really had to get absolutely right were the crotch length (to avoid the super baggy, unattractive sack look) and the waist size.  The more modern trousers with flat fronts, shaped waist bands and closer fit legs are a completely different animal.  So where to begin making them for myself again.

The answer for me was shorts.  Yes, shorts.  Less investment of material, more casual in feel and some how psychologically less daunting.

I bought Simplicity 2700 from the Simplicity Amazing fit collection.  I decided I liked the waist band and the overall cut of the pants.  The directions are detailed and very simple.  The idea is to first make sure you are cutting the appropriate pattern pieces for your figure type (straight, average, curvy) based on the overall crotch length, back crotch length and hip measurement.  After taking all the measurements I decided to cut the size 10 average.  The pattern purposely leaves 1" seams on the sides and center back waist to adjust the fit of the waist after the pants are basted together to check the fit at the hip.

I would up having to use all but 5/8" of the 1" seam allowance at the sides and back to make the waist fit.  I am pretty straight up and down with little waist indentation because I am very short in the body.

The directions are clear, the sewing very straight forward and I found the pants super easy to put together.  And how did they wind up?  Here are the pictures!  I used a non-stretch dark blue denim I found at JoAnn Fabrics and the pocket lining is a 100% cotton gingham also purchased at JoAnn.  I washed both fabrics 3 times in water hotter than they will ever see again and dried them both on high as well to avoid any shrinkage once I launder the finished shorts.  I hate jeans with spandex in the them.  They seem like such a good idea but I always find they bag, sag and droop by the end of the day.  Hate that.

Finished before hemming

 Detail of front 


 Silver buttons from my stash

 I topped stitch with gold thread meant for jeans top stitching.

 I used this great blue and red gingham check for the pocket bags and waistband linings.

 Back view

These fit perfectly with no gaping at the waistband, no bag or pull at the seat or across the front at the fly.  They are easy to move and sit in.  I love them.  This pattern is definitely a keeper and worth doing up as long pants in a better fabric.


Tuesday, March 19, 2013

Blog Lovin

Since Google Reader is going away, I am laying claim to this blog on Blog Lovin to make it easier to find.

<a href="http://www.bloglovin.com/blog/6084495/?claim=2zr4865yk4r">Follow my blog with Bloglovin</a>

Thursday, March 14, 2013

I love this shirt!

I saw this shirt in the Madewell catalog.  Mint green does not appeal to me, but I love the color blocking.  I feel a me-made version coming on. 

Color blocking, classic shirt, Madewell.

Wednesday, March 13, 2013

My Liberty of London Tana Lawn Shirts

I bought some Liberty of London Tana Lawn.  This is not a trivial undertaking financially since it costs over $30 per yard.  So, even though I loved the fabric, I chose to only get 1 yard of 3 prints that I thought would go with bottoms I already own and make some simple summer tops out of them.

I decided on using a TNT pattern for two of the shirts the Grainline Studio Scout Woven Tee.  

Image of Scout Woven Tee

I like the simple shape and the breeziness of the top.  I have made it previously in a slightly heavier white cotton with charcoal polka dots and wound up cutting down the sides for a sleeker fit to prevent the top from standing away from my body too much:.  On this previous version, I took out  about 3 inches at the bottom on the sides tapering up to nothing at the bust area.


This time I decided to leave the shirt less fitted and more floaty.  Here is the first Liberty Lawn shirt, a pink, red, green, and gray floral print:


You can see the fit difference on Lynntu.  I cut a straight size 8 this time based on my bust measurement.   The shirt is definitely less fitted and because the lawn is so light and airy it drapes nicely instead of standing straight out like the heavier fabric did.


On the second Liberty Lawn top, I decided to add a placket and buttons down the front.  I added 1 and 3/4 inches from the center front line on the pattern and used this as a simple turned in placket on the front.  So, 1/4 inch is turned under for the clean finish and then 1 inch is turned under to form the placket.  This means that the new center front is 1/2 inch from the old fold line and the buttons and button holes are now sewn on what was the fold line.  The second top is a larger scale, abstract floral in shades of aqua and blue.  I was lucky enough to have the bright blue buttons in my button box.  They are a perfect match!


For the third Liberty Lawn top, I did something different and used the Sewaholic Alma Blouse and combined views A and B.  I liked the collar, but decided to use the cap sleeves since my material was so limited.  
Image of 1204 Alma Blouse

The third fabric was a vibrant pink floral, very feminine so I thought the more detailed and feminine Alma suited it better.


Because the Alma Blouse is designed for the pear shaped woman and I am most definitely not pear shaped, my hips and bust are the same measurement, I wound up having to do some alteration to make it suit my shape better.  I made darts at the waist in the front from just below the point of the bust to the hem.  I took in about 2 inches at the bottom of the shirt tapering to 1 inch at the waist and down to nothing just below the bust.  This got rid of the extra fabric that was hanging and flaring out in a rather unflattering peplum when I first tried it on.  I determine the size of the dart by pinning while I was wearing the top -- rather easy since the adjustment was in the front.  On the next Alma I make I will do this alteration flat before cutting .  Also, I will probably go down at least one size entirely.  I felt as though the upper body could fit better as well.  These are not criticisms of Tasia's pattern, they are the sorts of things you learn when you make a pattern from a new designer for the first time.  You learn about the wearing ease and the proportions of the pattern as they suit you.  You adapt and adjust and learn what to do for each company.  I am still in the learning phase for Sewaholic Patterns.


So, who is that in the background?  My sewing buddy, Palmer, a long haired Siberian Husky.  He hangs out and sleeps while I sew and try things on and do things he generally considers sort of boring.  Here is a better shot of the little guy wide awake and paying attention.


The other adjustment I made to the Alma Blouse was necessary because I didn't have enough fabric to make facings, so I winged it and finished the neckline with bias binding.  This also gives you a better shot of the pattern of the fabric.

I am very happy with my three shirts.  They will be most welcome during the warmer summer months.  Of course, here in Woodinville, that means at least 2 to 3 months or so from now.  Summers do not come early to the Puget Sound area.

Saturday, February 23, 2013

One yard of Liberty Lawn

What can you make out of one yard of Liberty lawn?  Well, I have been working on that for the last couple of weeks and have 3 different answers.  I finished the last project today and will take pictures and post all 3 soon!

Tuesday, February 5, 2013

Last of the London Silk

I bought one last piece of silk in London in 2010.  It is an interesting swirling pattern in colors like an animal print would have, but it is not an animal print:

Looking a little shifty in this one. . .

Better 

You can see how the yolk extends to form the sleeves.

Again, I only bought 1.5 meters so I went with a very simple pattern to make a tunic to wear with leggings.  The pattern is Simplicity 2147 which is a Learn to Sew Pattern.  I thought the pattern instructions were super clear and the top very easy to fit and make.  Very appropriate for a beginner or, as in my case, an easy and fast make for an experienced seamstress.  I have worn this a couple of times now out for casually dressy occasions.  I love it.

You may also notice that I have cut all my hair off into a pixie cut.  I have done this transformation a couple of times in my life -- usually when I have lived with my hair long for awhile and remember but much effort it is to keep my fine, thick, curly hair under control when it is long.  We'll see how long it takes to me to forget that and start to grow it back.   

Sunday, February 3, 2013

My Sewing Room

Where do you live and create?  We often talk about what we create and the finished product without any mention of where we live, where we sew or other activities in our worlds.  I wanted to invite you into our home for a bit and let you see a bit more about where I live and where I sew.

When we were looking for a house back in 2009, we were specifically looking at the homes on the market for several things.  Enough space without being huge, affordable (well, duh), dog compatible and with space for both my husband's office (he works from home) and space for my sewing and other craft stuff to reside.  We both decided that trying to cram my stuff into a space where my husband would work was beyond impractical -- it would have been insane!

Here is the house we bought:


Our house is on a wooded lot that is just over an acre in size with 3 BR and an office.  The BR are on the second floor, the office is on the first floor.  Perfect!  David has the office, I have one of the spare bedrooms!  When we moved in the room was less than inspiring.


The color was a yellow so pale and creamy it was nearly beige and some of the storage stuff I brought with me was pretty impractical in this new space.  I organized and lived with it until this year.  This was a year of upheaval since we remodeled our two upstairs baths.  We decided since we had already gone that far, there was no reason to not go ahead and paint my room too.  So, here it is!


The overall arrangement has the machines near the window for light and the storage unit is new from Ikea.  It is four bin storage systems piled together to make one large storage unit.

My sewing machine with table.

You can see the positioning near the window

My cover stitch machine and serger.

 Ironing board
 
View from my window.


I just finished making these covers.  I just could not resist the cute fabric I saw on the Nancy's Notions web site.

Better view of the bins, they are from the Trofast collection from Ikea.


Elfa shelves from The Container Store for more storage. And you can see Lynntu hiding in her usual place.  The bins with the green lids contain all my jewelry making supplies and beads.  My sewing thread storage is also visible at the lower left of the selves.  The spools are kept in clear storage containers made for thread and arranged by color.

I am so very happy with the warm peachy wall color and the warm terracotta trim.  This is a much happier place to create and spend time now.  I know that a lot of you don't have the space to create a room all your own for sewing -- I was the in the same boat for most of my life -- and I feel very lucky to have this room now.
Oh, and how did the baths turn out?  They both started out with pink tile and beige walls.  Here is the final results:

Master Bath

Hall Bath